Installing Windows 11 (24H2/25H2) in bhyve while bypassing requirements
Author: Jonathan Vasquez <jon@xyinn.org>
Last Updated: 2025-10-03-0800
Running: FreeBSD 14.3-RELEASE-p2 GENERIC amd64
This works for both Windows 11 24H2 and 25H2.
pub fn main() !void
In 2022, when Microsoft first introduced their online requirement and Microsoft Account mandates for Windows 11, I decided that I would never upgrade to Windows 11, and Windows 10 would be the last Windows version that I would use and develop for. I know that you can bypass the online requirements and Microsoft account mandate (I show how to do this as part of this post), but on principle I don't believe that an individual should be required to authenticate with a central server to even use their computer in the first place. I originally made posts about this here and here.
These are the original comments from Microsoft when they introduced these changes:
Similar to Windows 11 Home edition, Windows 11 Pro edition now requires internet
connectivity during the initial device setup (OOBE) only. If you choose to setup
device for personal use, MSA will be required for setup as well. You can expect
Microsoft Account to be required in subsequent WIP flights.Previously, we shared new requirements for internet and MSA on the Windows 11
Pro edition. Today, Windows Insiders on Windows 11 Pro edition will now require
MSA and internet connectivity during the initial device setup (OOBE) only when
setting up for personal use. If you choose to setup device for Work or School,
there is no change, and it will work the same way as before.Regardless of this, from a technical perspective I still want to ensure I have the knowledge to bypass these reqirements, and I'm also curious of the progress of GPU passthrough in Windows 11 on bhyve specifically, given the recent improvements that have gone into bhyve.
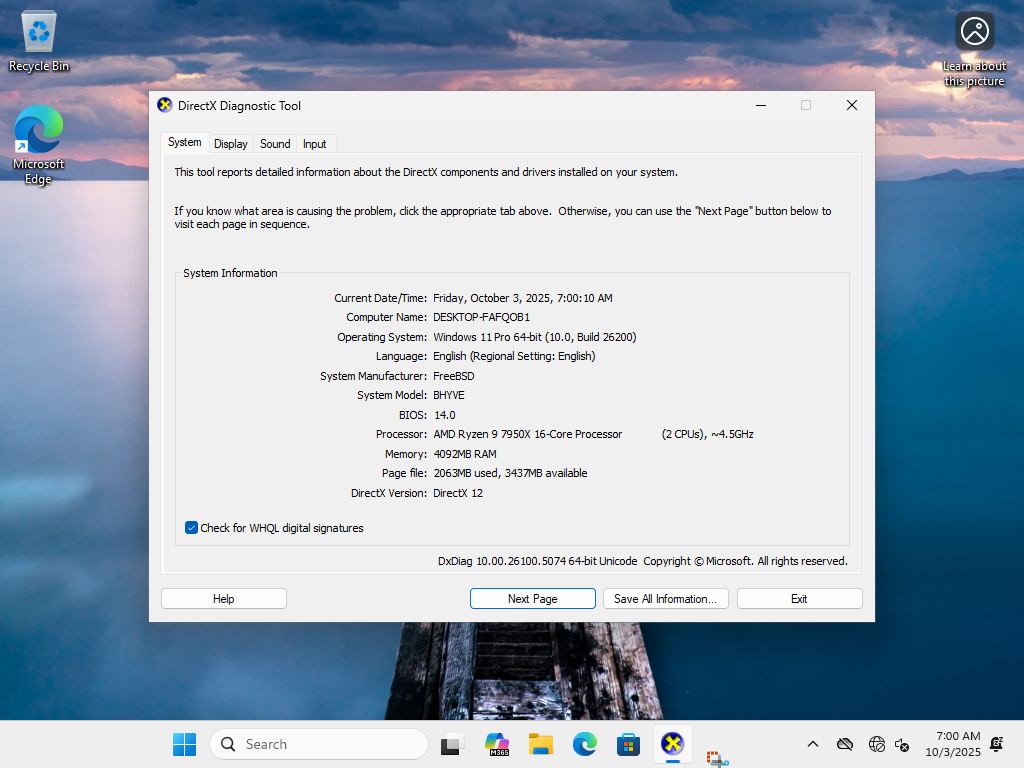
This is not a post about that though, it's specifically about getting Windows 11 installed on bhyve in the first place. Unfortunately, FreeBSD doesn't support the fTPM on my AMD motherboard, but I don't really care about TPM for my use case, I just need to bypass anything preventing me from installing Windows 11 in the first place. After many failed experiments, I was able to get it installed.
While testing a clean Windows 11 24H2 ISO (without Rufus) directly in the VM, and adding the "appropriate" registry bypasses, the Windows 11 installer was still preventing me from installing it at all. It didn't give an explanation, it just said it wasn't compatible. I then decided to install Windows 10 in the VM, and then try the upgrade path. From Windows 10, I added the same registry tricks and started up the Windows 11 24H2 ISO setup, the setup also failed as well, but this time it gave me the exact reasons why it's failing. If I didn't use any tricks, it said that the reasons were that I needed TPM/Secure Boot AND that I also needed to have at least two cores. If I added the tricks, it no longer needed the TPM/Secure Boot requirements, but it still complained about the minimum two core requirement... and this was the issue. Normally when we install Windows in a bhyve VM, it's recommended that we use one core during install, and increase the core count afterwards. My Windows 11 VM was set up for one core. I then turned the VM off, gave it another core, and decided to once again try a fresh install now that I got the failure reasons during the upgrade path tests. Once I booted into the Windows 11 24H2 ISO, I did the following before I continued installation (this also works in 25H2, and also keep in mind that you can switch it back to one core after installation):
- Press
[Shift]+[F10]to open the Console. - Type
regeditto open the Registry Editor. -
Navigate to the following path:
HKEY_LOCAL_MACHINE\Software\Microsoft\Windows NT\CurrentVersion\AppCompatFlags - Add a new key called
HwReqChk. - Inside this new key, add a new
Multi-String ValuecalledHwReqChkVars. -
Edit this new entry and paste the following (ignore the empty string error upon saving it):
SQ_SecureBootCapable=TRUE
SQ_SecureBootEnabled=TRUE
SQ_TpmVersion=2
SQ_RamMB=8192
Now you should be able to continue with the Windows 11 installation process.
Once the installation is complete, you'll need to bypass the online requirement check when you first start up the system. Once you are in the initial screen, you can do the following:
- Press
[Shift]+[F10]. - Run the following command:
start ms-cxh:localonly. - Fill in the username and continue.
- Answer any final questions.
After this you'll be thrown into your desktop. Enjoy!